
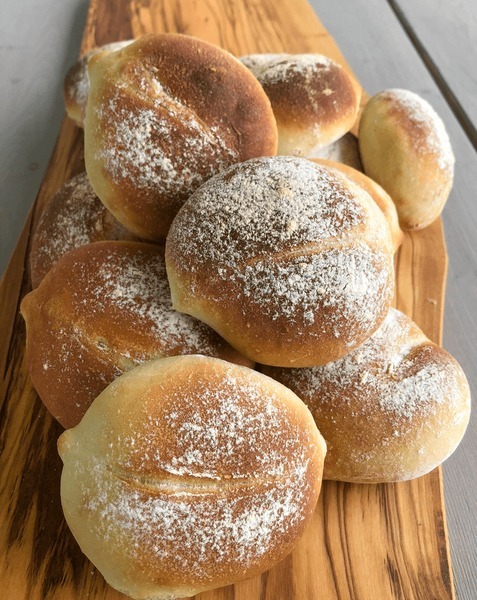
Portuguese roll, known as “pãozinho” in Portugal, are delightful bread rolls that have captured the hearts and appetites of many around the world. These fluffy, soft buns are great as a snack or eaten with meals. They are a flexible complement to any dining experience because of their distinct flavor and texture.
Ingredients for Portuguese Roll
To create authentic Portuguese rolls, specific ingredients are essential. These include:
Flour: A high-quality all-purpose flour is preferred for its ability to develop gluten, giving the rolls their characteristic softness. Some bakers may also choose bread flour for a chewier texture.
Yeast: Active dry yeast or fresh yeast is used to leaven the dough, allowing it to rise beautifully. Yeast not only provides lift but also contributes to the flavor profile.
Water: Warm water helps activate the yeast and hydrates the flour. The temperature of the water is crucial; too hot can kill the yeast, while too cold may not activate it properly.
Salt: Essential for flavor, salt also strengthens the dough. It controls yeast activity and enhances the overall taste of the bread.
Sugar: A small amount of sugar enhances browning and adds a hint of sweetness. It also provides food for the yeast during fermentation.
Butter or Olive Oil: These fats contribute to the richness and tenderness of the rolls. While butter offers a creamy flavor, olive oil adds a Mediterranean touch.
Each ingredient plays a crucial role in achieving the perfect texture and flavor profile that defines Portuguese rolls.
Portuguese Roll Recipe
Step 1: Preparing the Dough
Start by bringing your yeast to life. Put the yeast, sugar, and warm water in a basin. Until it starts to foam, let it sit for five to ten minutes. By taking this step, you can be sure your yeast is active and prepared to produce magic.
Mix the flour and salt together in a large mixing dish. Create a well in the middle and add the melted butter or olive oil to the activated yeast mixture. Stir to produce a shaggy dough.
Step 2: Using a Kneading motion
After transferring the dough to a floured surface, knead it for ten minutes or so, or until it becomes elastic and smooth. Gluten is developed during kneading and provides structure to the bread. Knead the dough for approximately five minutes on medium speed if you’re using a stand mixer with a dough hook.
Kneading is more than just mixing; it’s also about giving the dough strength. It should be stretchy enough to stretch without ripping, which will help your rolls develop those beautiful air pockets.
Step 3: First Rise
The kneaded dough should be placed in a basin that has been lightly oiled, covered with plastic wrap or a damp towel, and let to rise in a warm location until it has doubled in size, about one hour. The formation of flavor and texture depends on this first ascent.
Enzymes convert starches into sugars during this period, feeding the yeast and producing carbon dioxide gas, which causes the dough to expand. Your rolls’ flavor profile gains complexity as a result of this fermentation procedure.
Step 4: Shaping the Rolls
Punch down the dough gently to release any trapped air bubbles once it has risen. Cut it into chunks that are equal—roughly 10 to 12 pieces. To create tension on the surface, tuck the edges underneath and shape each piece into a round ball.
Forming the rolls is a crucial step since they will rise uniformly in the second rise and turn out beautifully when baked.
Step 5: The Second Rise
With space between each roll for expansion, place the formed rolls on a baking sheet covered with parchment paper. Put a damp cloth over them once more and let them rise for a further thirty to forty-five minutes, or until they have risen considerably.
This second rise promotes additional fermentation and gives your finished rolls an even lighter texture.
Step 6: Baking
Turn the oven on to 375°F, or 190°C. When preheating your oven, place a shallow pan filled with water on the bottom rack to create steam, adding an extra layer of authenticity.
For a glossy appearance, you can apply an egg wash—a concoction of beaten egg and water—to the tops of the rolls before baking. Bake for 15 to 20 minutes, or until the tops become golden brown.
The characteristically soft and fluffy interior of excellent bread-making is maintained as the steam contributes to the crusty exterior.
Step 7: Cooling
After baking, take the rolls out of the oven and place them on a wire rack to cool. Steam can escape during this chilling phase, keeping your rolls’ light texture intact.
Although cooling is sometimes disregarded, it is crucial because trapped steam can cause gummy interiors when cutting into hot bread.
See also: Green bean stew
Flavor Variations
Though classic Portuguese rolls are delicious on their own, you may also try these many variations:
Cheese-Stuffed Rolls: Before shaping, include cheese, such as feta or queijo da Serra, into your dough.
Herb-Infused Rolls: For an aromatic twist, add fresh herbs like thyme or rosemary.
Rolls with a kick: Add diced jalapeños or crushed red pepper flakes for a thrilling twist.
Sweet Rolls: For breakfast delights, add dried fruits such as raisins or cranberries to the dough along with spices like cinnamon or nutmeg.
You can alter these variants to suit your own tastes or the availability of seasonal ingredients when making Portuguese rolls.
Serving Ideas
Portuguese roll are quite adaptable and taste great in a variety of ways.
Warm up and pair with butter for an easy yet delicious dessert.
As Sandwiches: Use them as the foundation for sandwiches stuffed with cheese, pickles, and cured meats like chorizo or presunto (Portuguese ham).
With Soups: These soft rolls are ideal for soaking up aromatic broths, so pair them with substantial soups or stews.
As Breakfast Rolls: Savor them warm and topped with honey or jam for your morning meal.
Portuguese rolls can be served in a variety of ways to complement any meal or occasion.
In summary
Making Portuguese rolls is a process that involves more than simply baking—it’s about embracing culture, tradition, and community via food. These rolls, with their tender texture and delicious flavor, are a great addition to any meal, whether it’s a family dinner or a festive get-together.
Portuguese roll are likely to make an impression on anyone who eats them, whether they are eaten right out of the oven or as part of a fancy supper.